API Management - Hands-on Lab Script - part 3
- Lab Prerrequisites
- Part 1 - Create an API Management instance
- Part 2 - Developer Portal and Product Management
- Part 3 - Adding API’s (You are here)
- Part 4 - Policy Expressions
- Part 5 - Versioning and Revisions
- Part 6 - Analytics and Monitoring
- Part 7 - Security
- Part 8 - DevOps
API Management
An API represents a set of operations that can be invoked. New APIs are defined and then the desired operations are added. An API is added to a product and can be published; it may then be subscribed to and used by developers.
APIs
On the left menu, open the [APIs] blade. You will see all APIs, the possibility to add new ones but also to customize existing ones
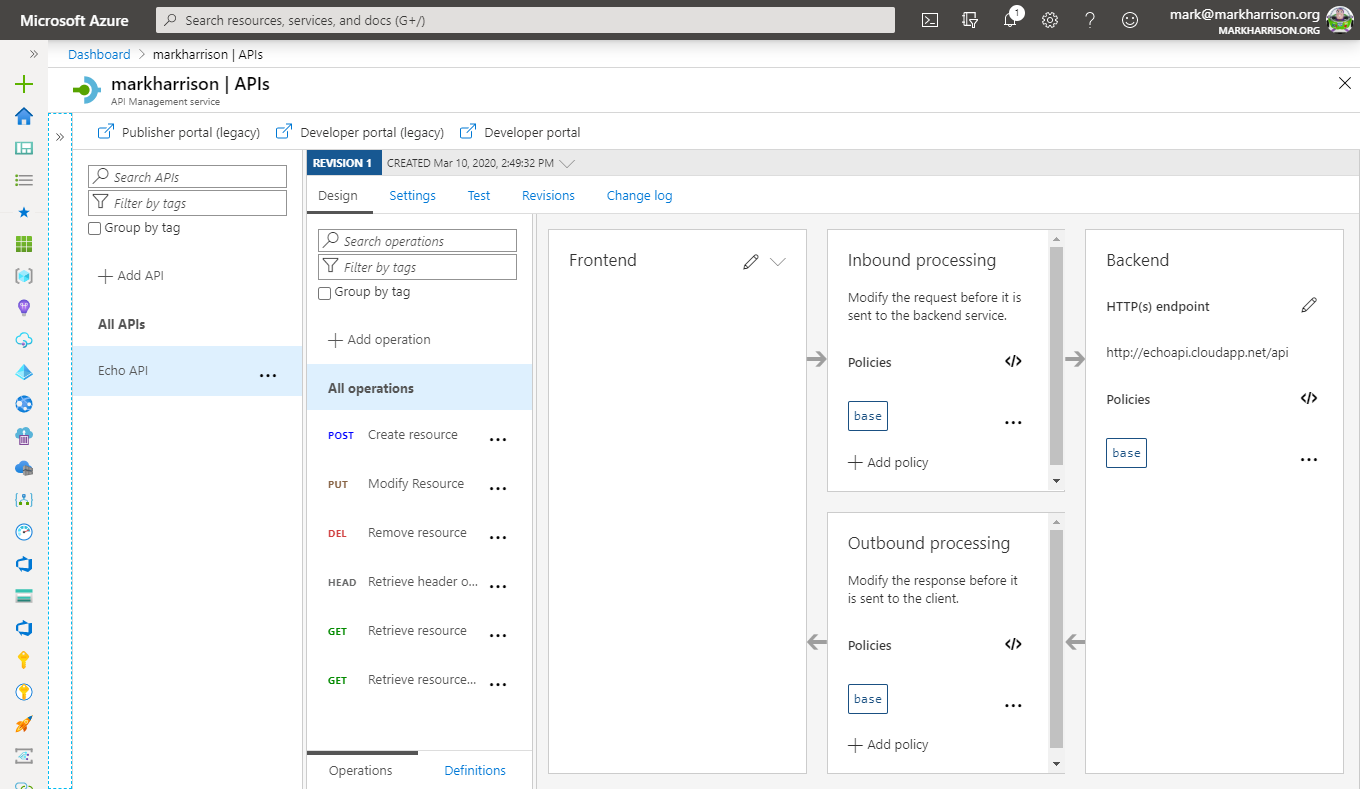
Add API from scratch
Instead of coding an API, for this lab you will use the existing Star Wars API https://swapi.dev.
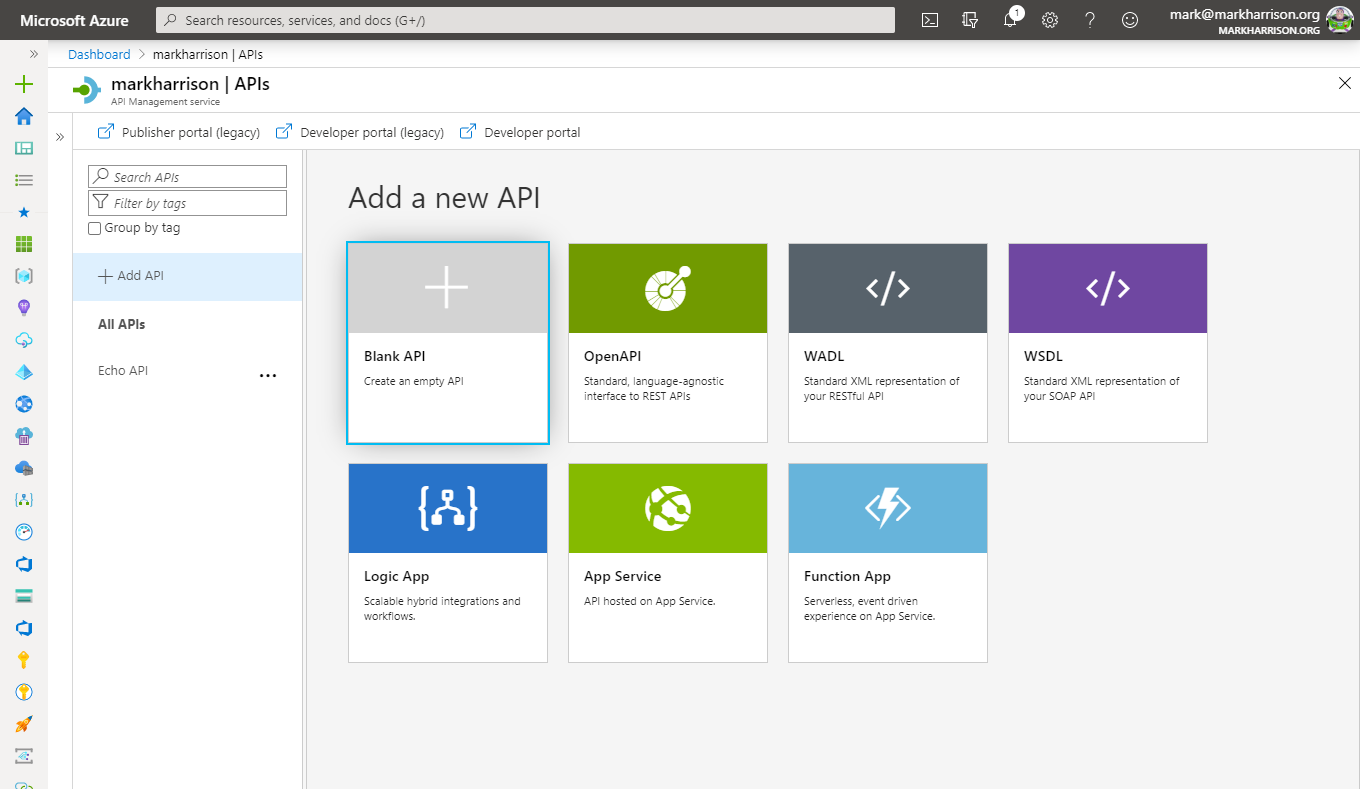
- Click on [Add API]
- Select [Add Blank API]
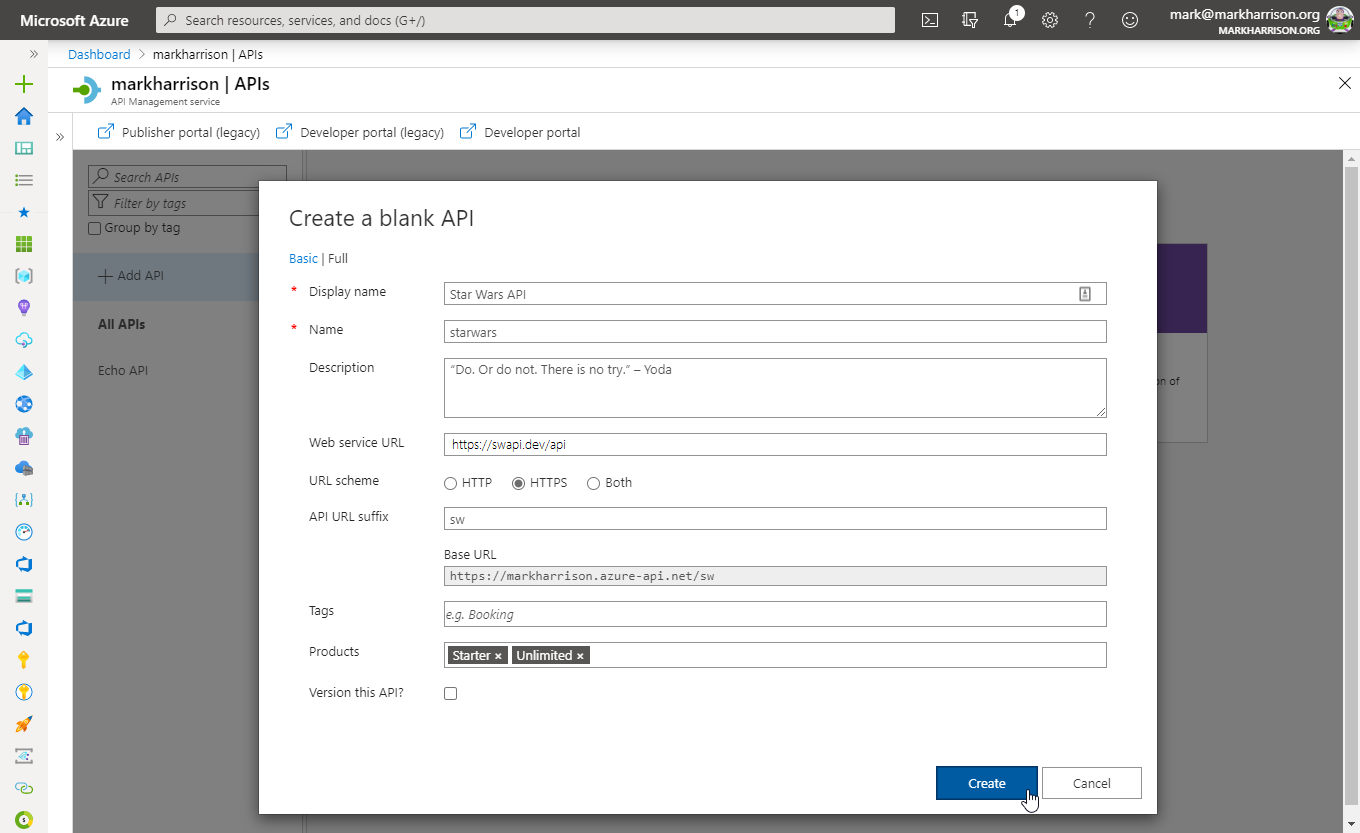
- Select the [Full] option at the top of the dialog
- Enter Display name, name and description
- Enter back end Web Service - this is https://swapi.dev/api
- Set API URL suffice to “sw”
- Assign Products - Starter and Unlimited
- Create
Once created, select [Start Wars API]
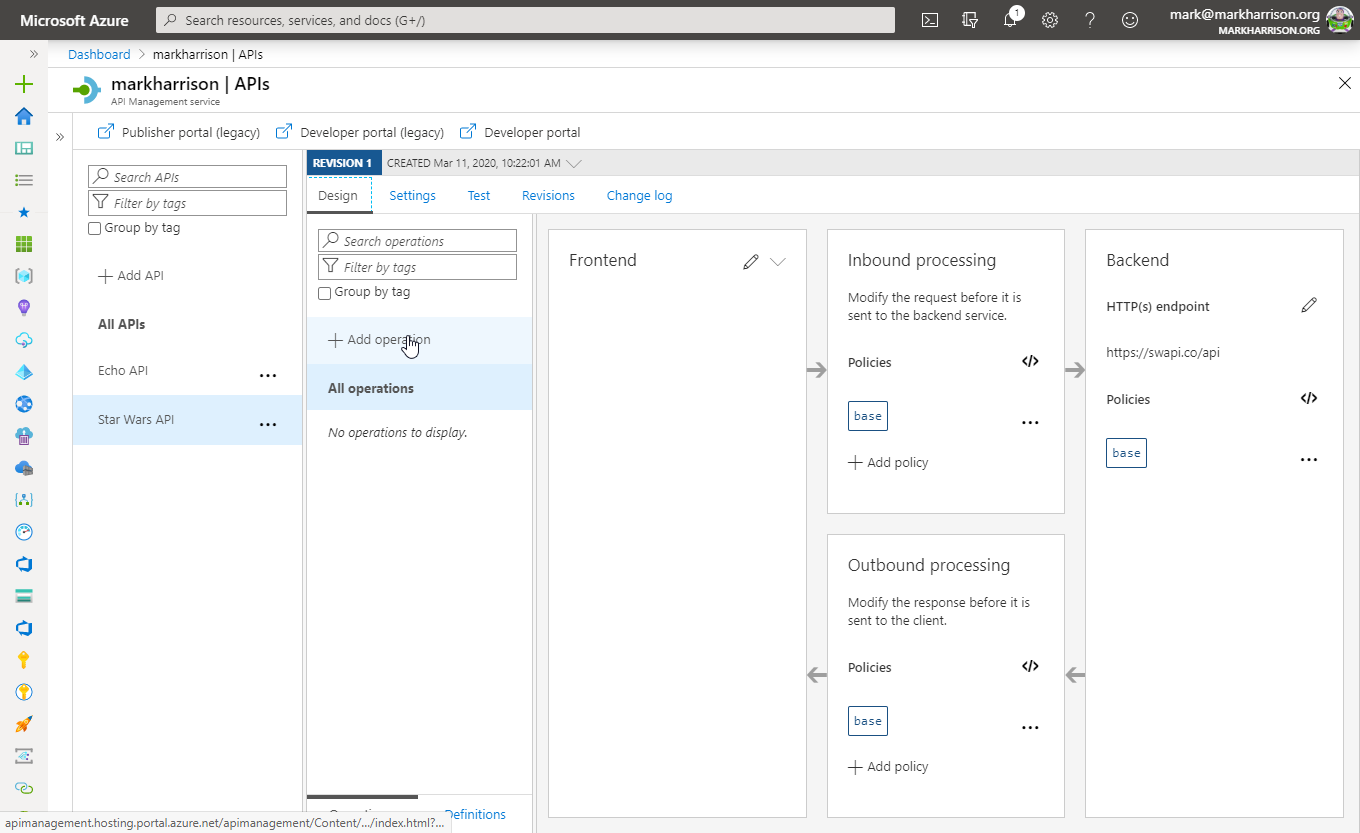
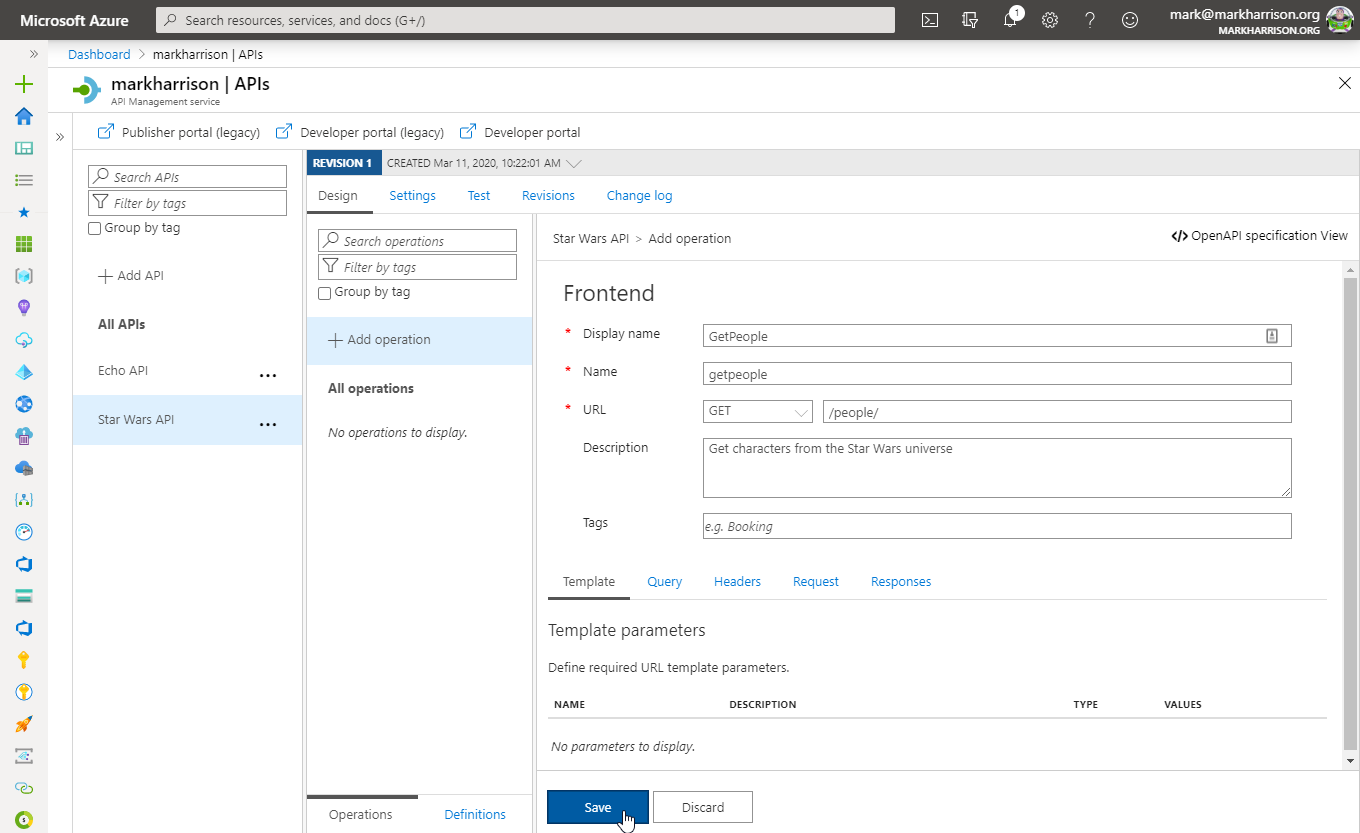
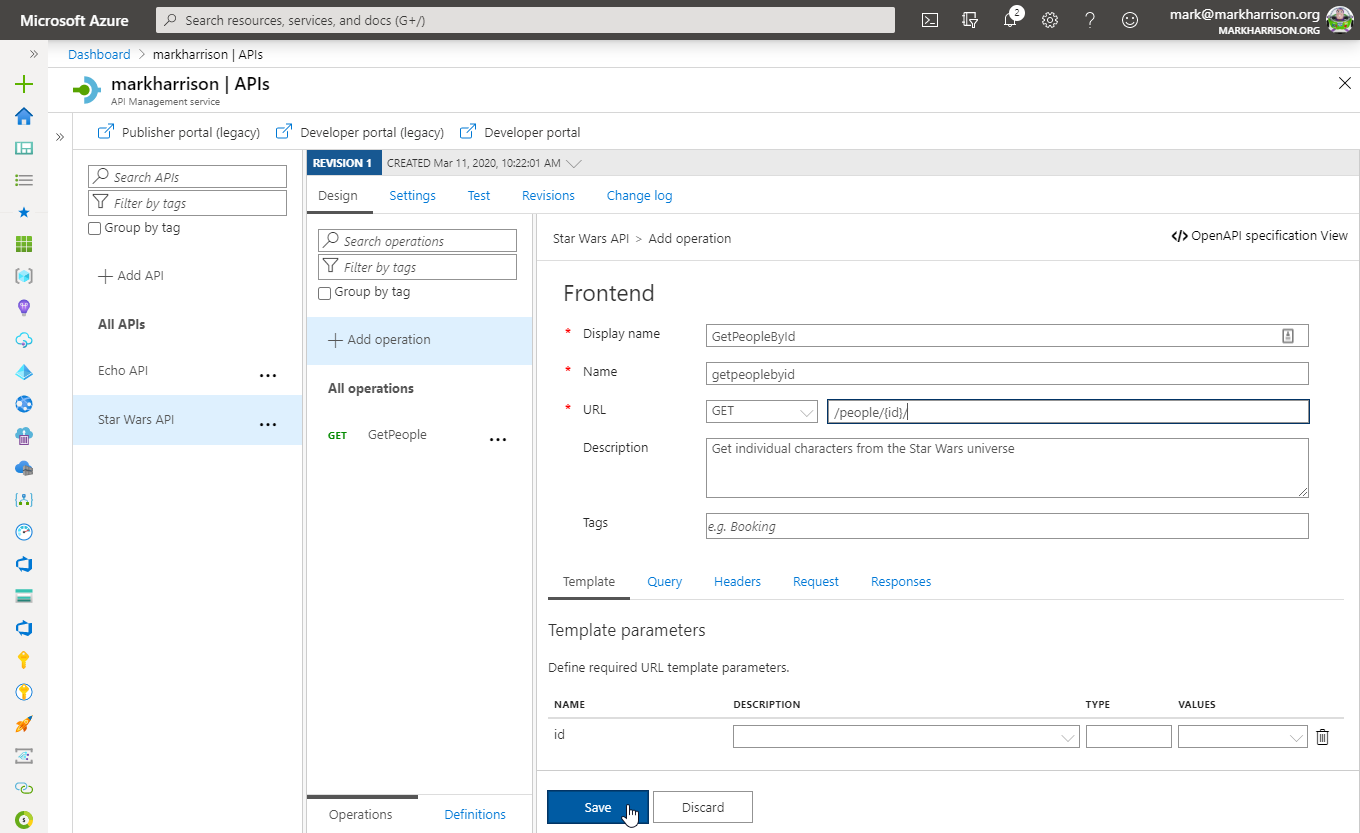
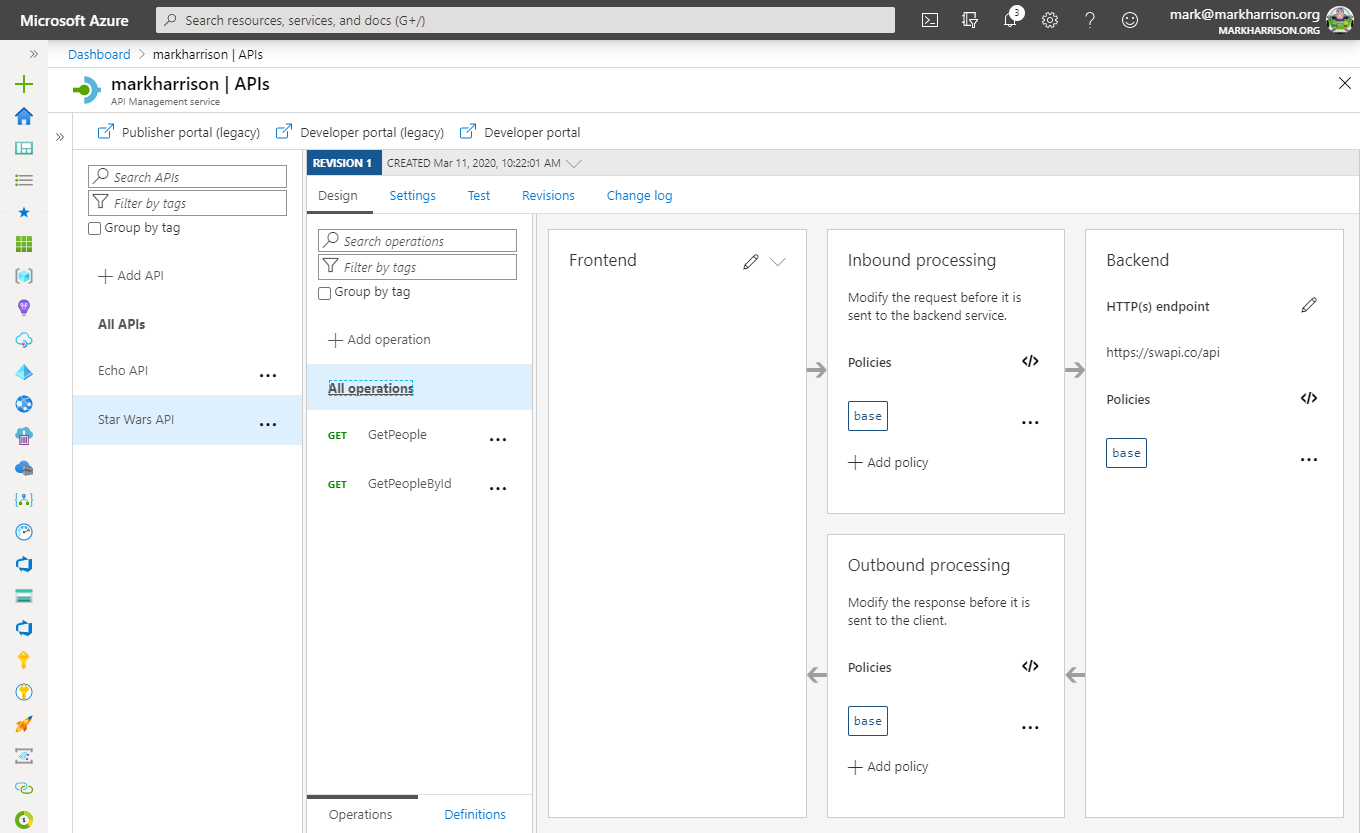
Lets declare two operations
- GetPeople GET /people/ … use lowercase
- GetPeopleById GET /people/{id}/ … use lowercase
Switch now to the Developer Portal
- Sign in as a developer with a subscription
- Select [Start Wars API]
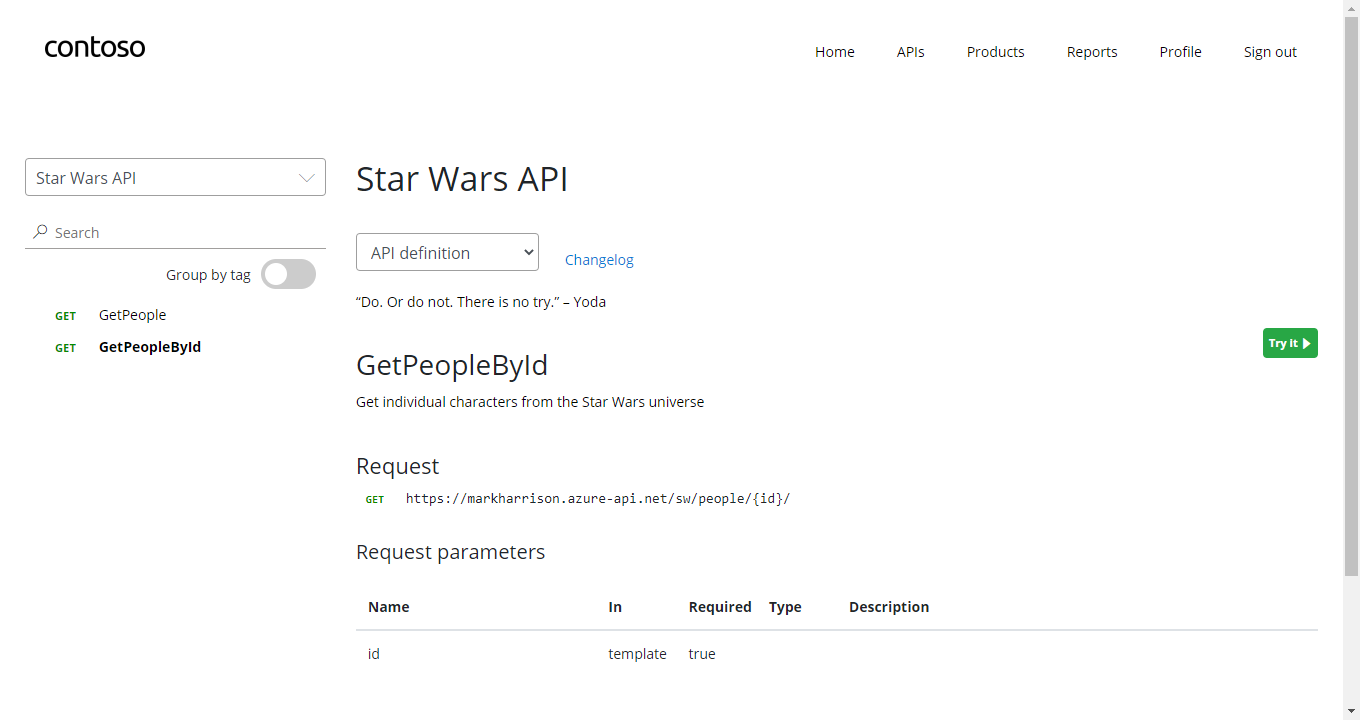
- Try the “GetPeople” operation
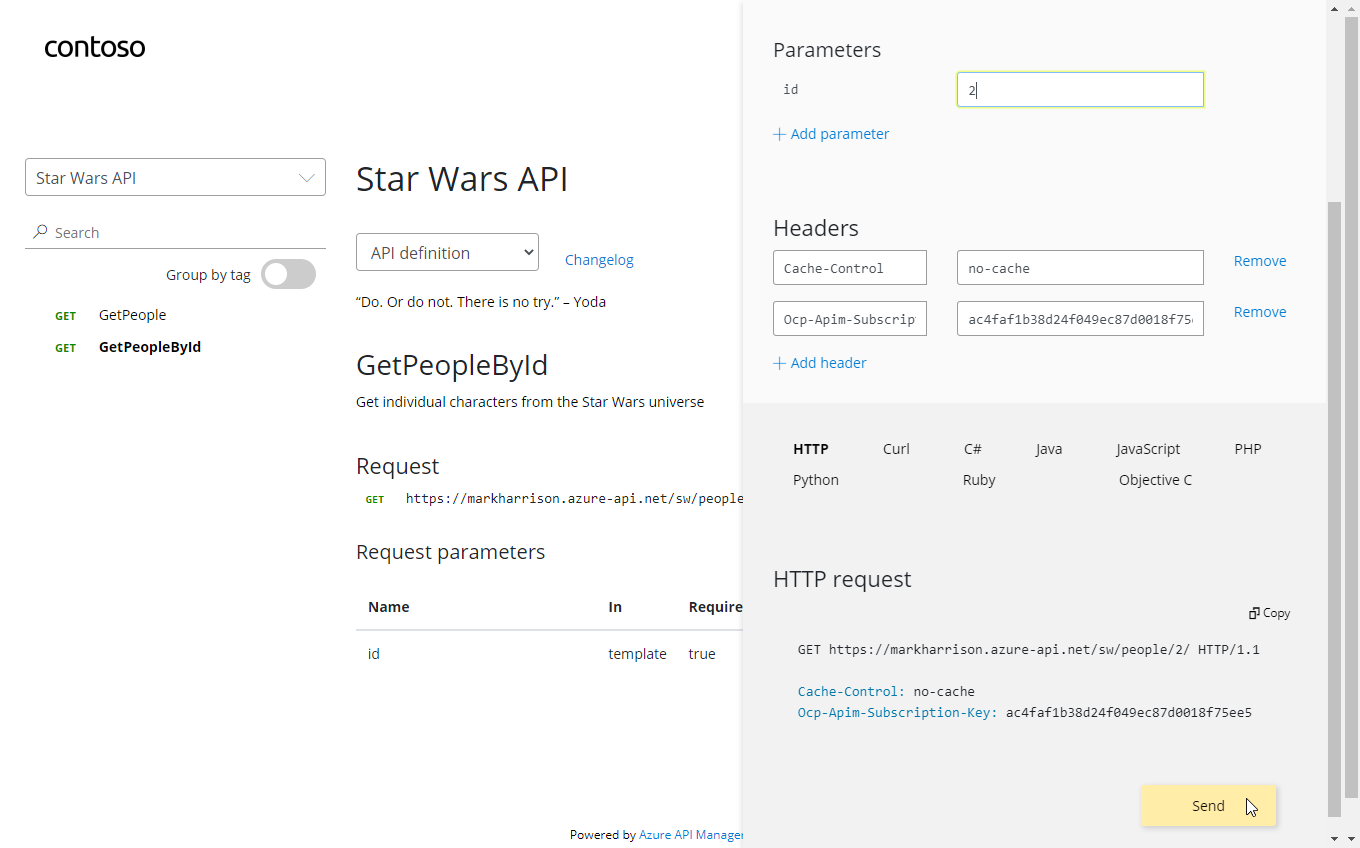
- Try the “GetPeopleById” operation … with id = 2
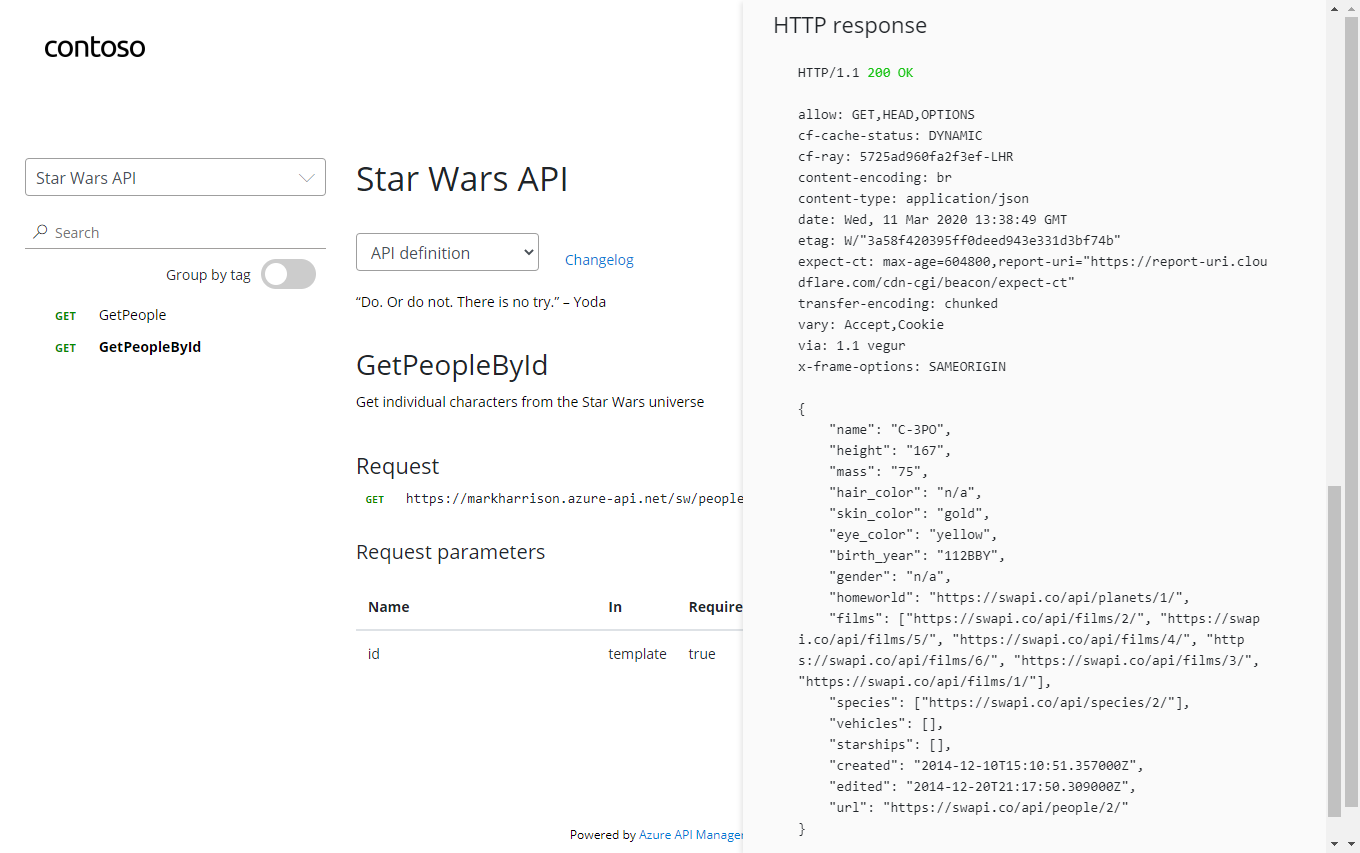
Examine Response and more detailed Trace information
- Response 200 successful
- Information about C-3PO in the Response body payload.
Import API using swagger
Instead of importing operations one by one, you can also import a full API. The OpenAPI specification (aka Swagger) is a definition format to describe RESTful APIs. The specification creates a RESTful interface for easily developing and consuming an API by effectively mapping all the resources and operations associated with it.
As a demo we will use an API that offers a simple calculator service : Calc API

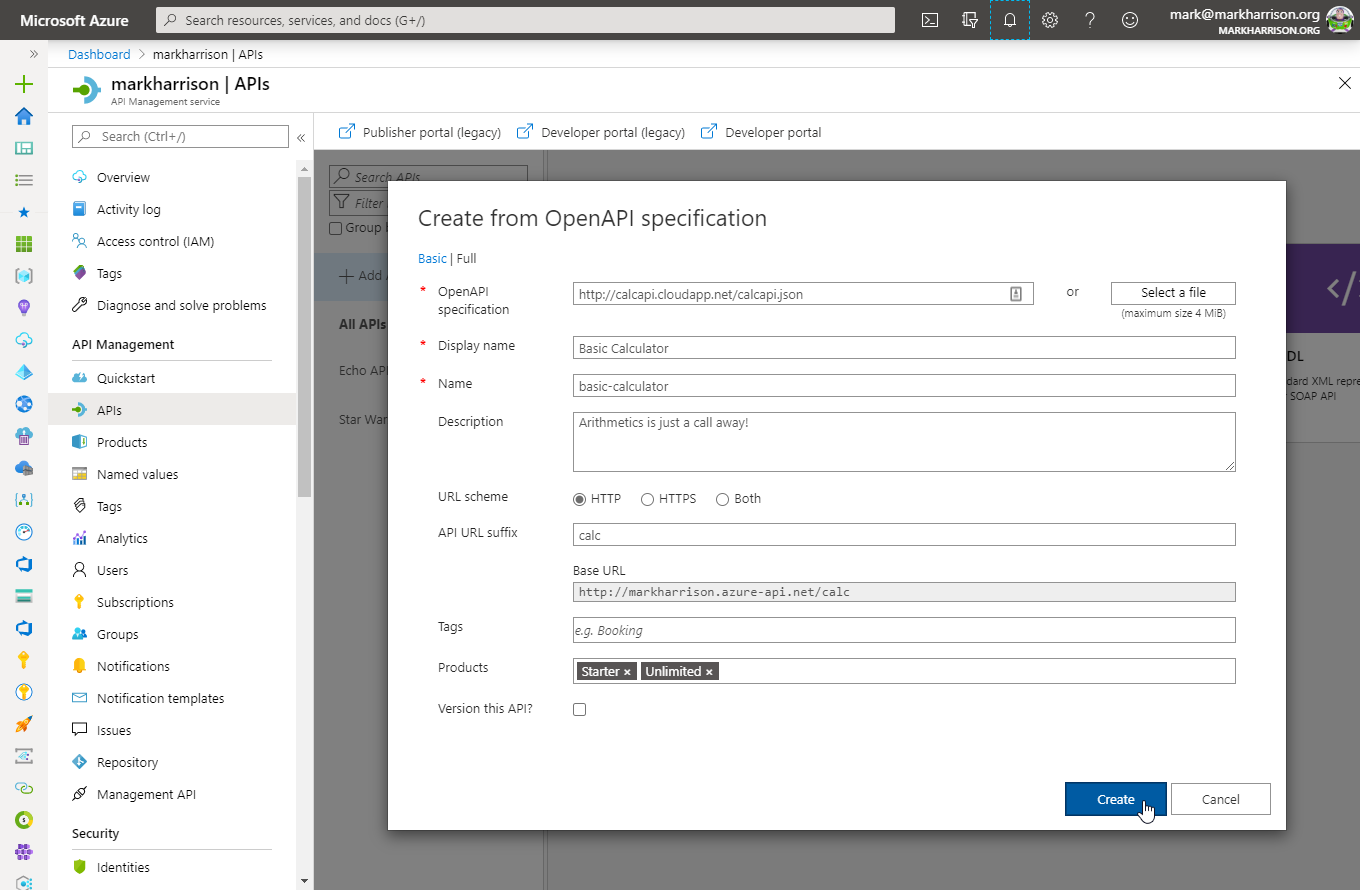
Go to APIs blade and select [Add OpenAPI Specification]
- Specify swagger URL http://calcapi.cloudapp.net/calcapi.json
- Some of the fields will be populated from the swagger definition
- Use “calc” in URL for API suffix
- Add products Starter and Unlimited
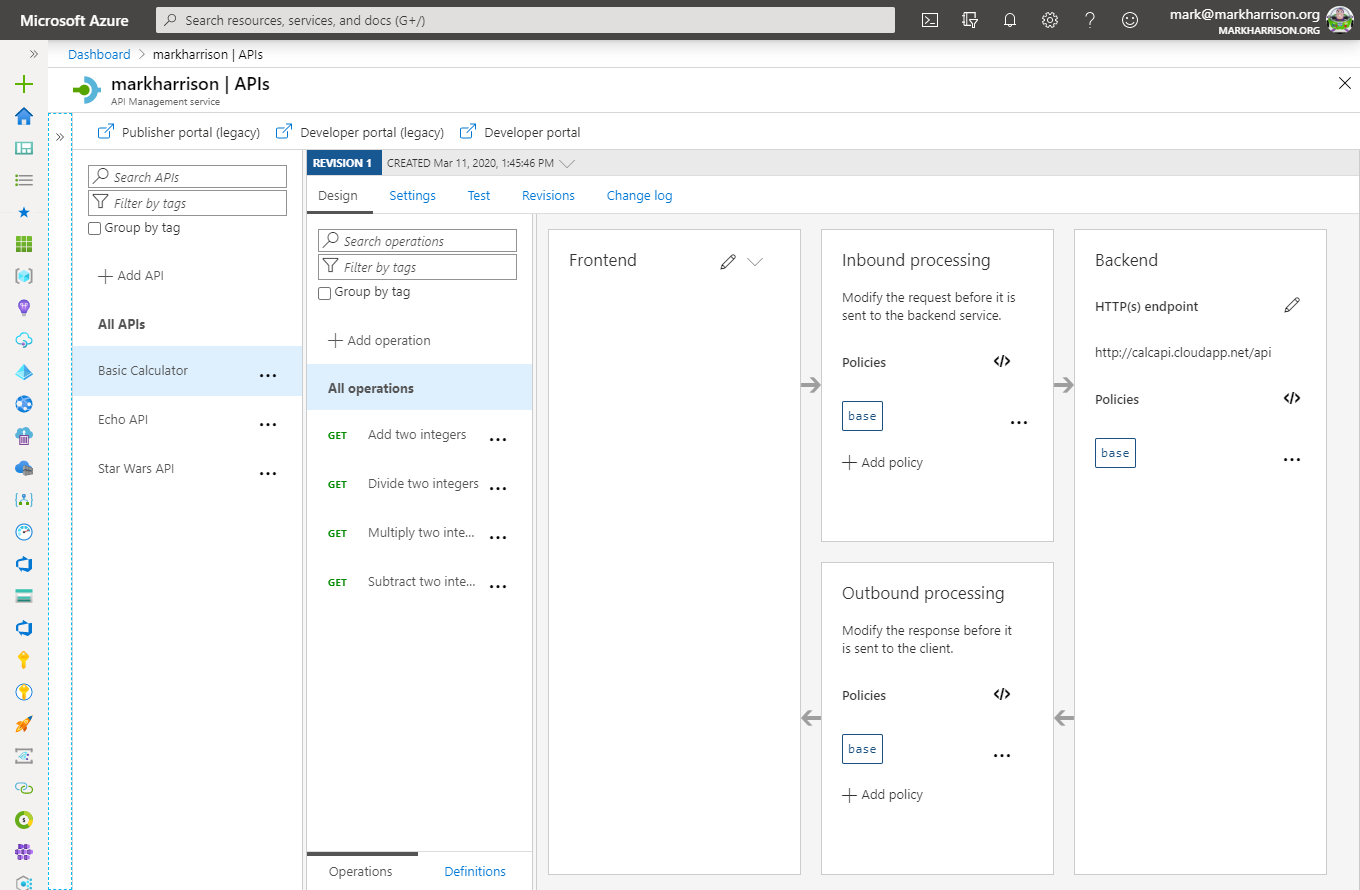
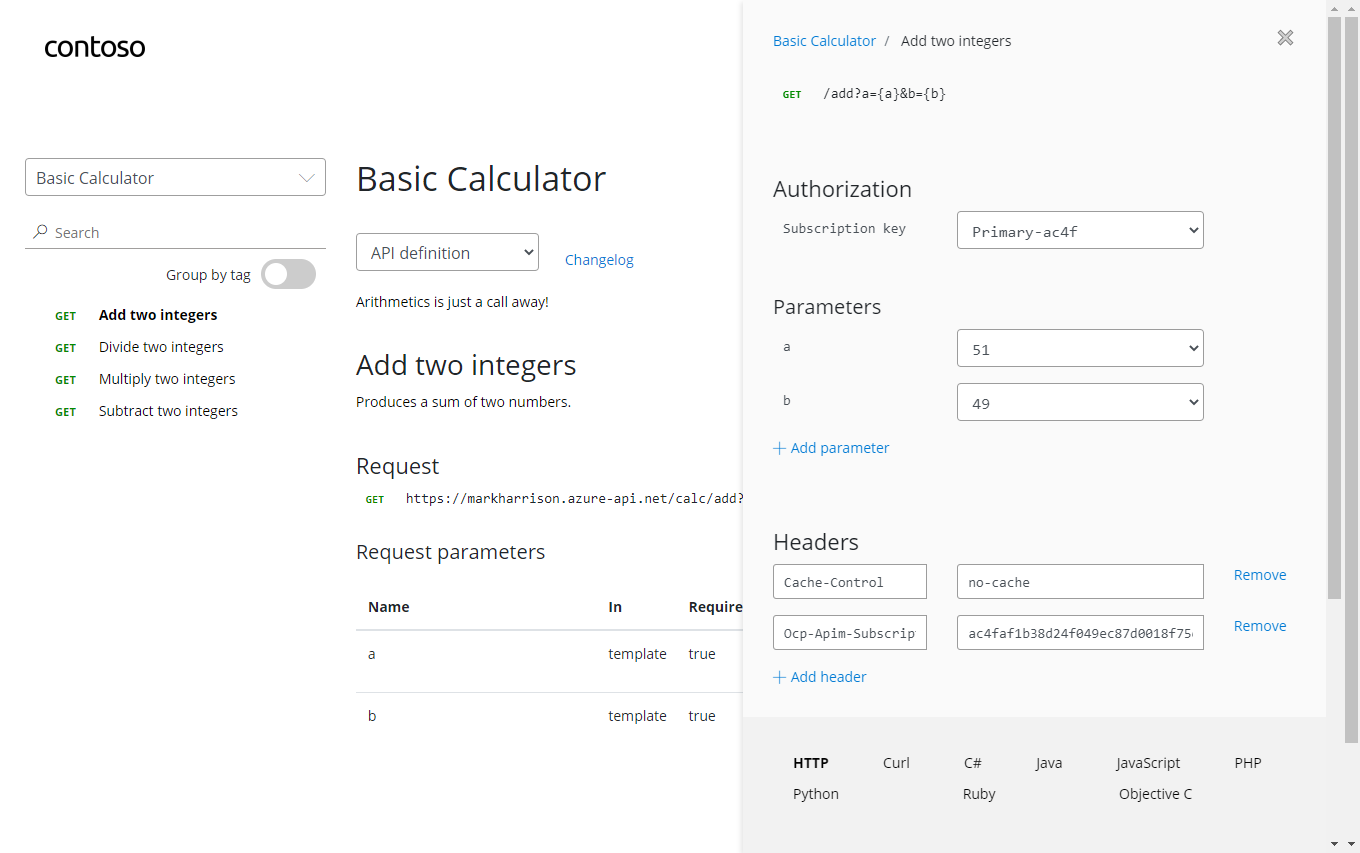
- Look at Calculator API in the Developer portal
- Try the Add Two Integers operation
- Look at Response / Trace
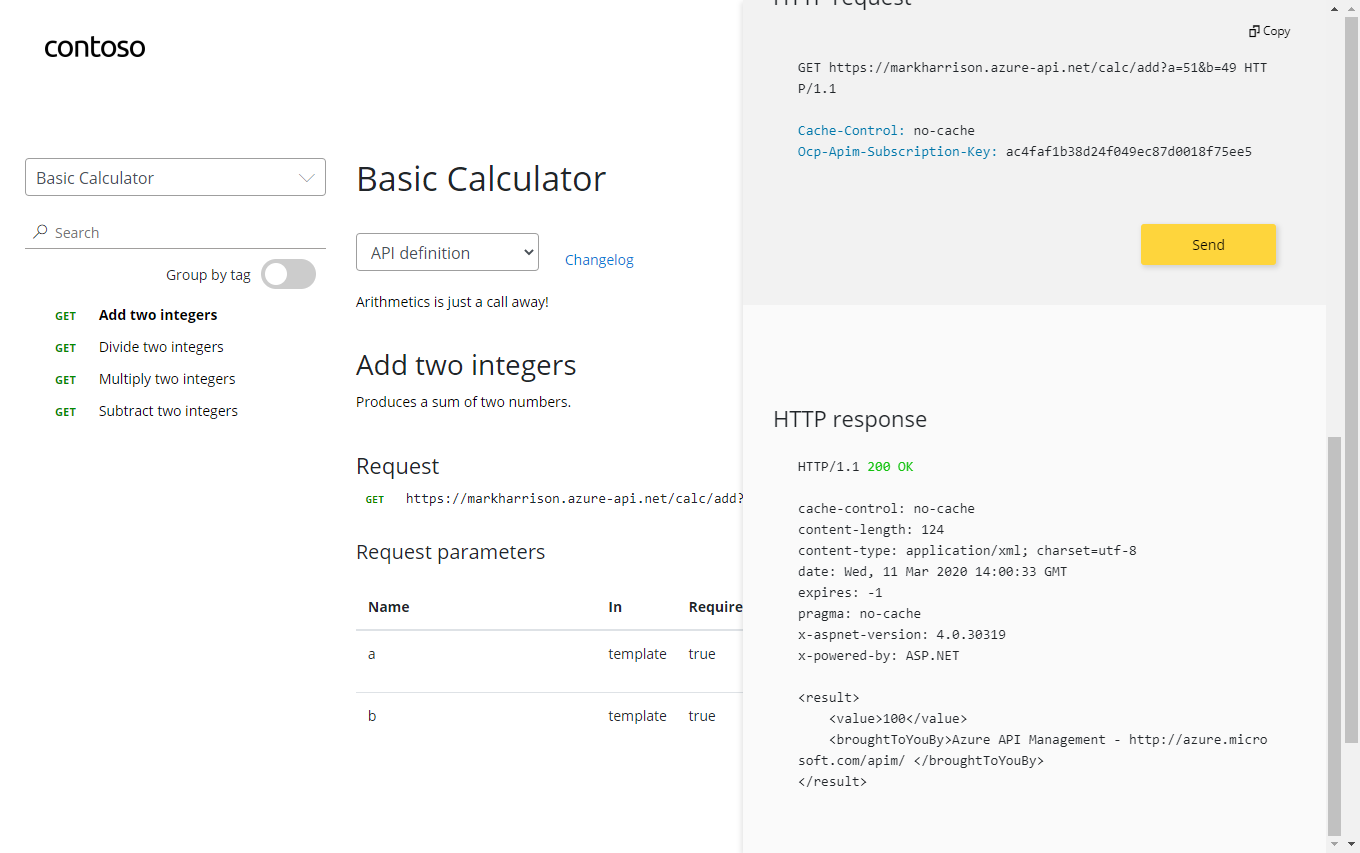
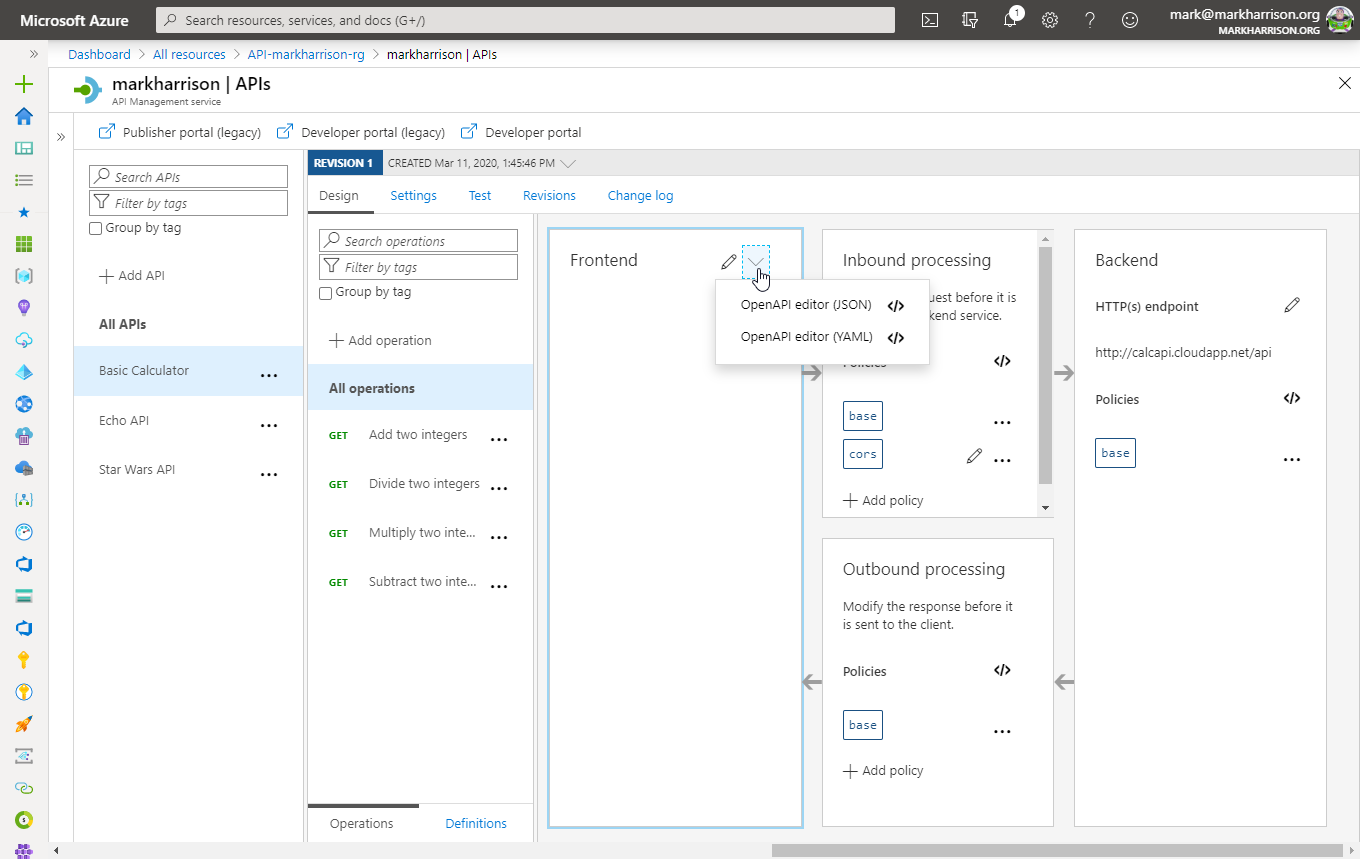
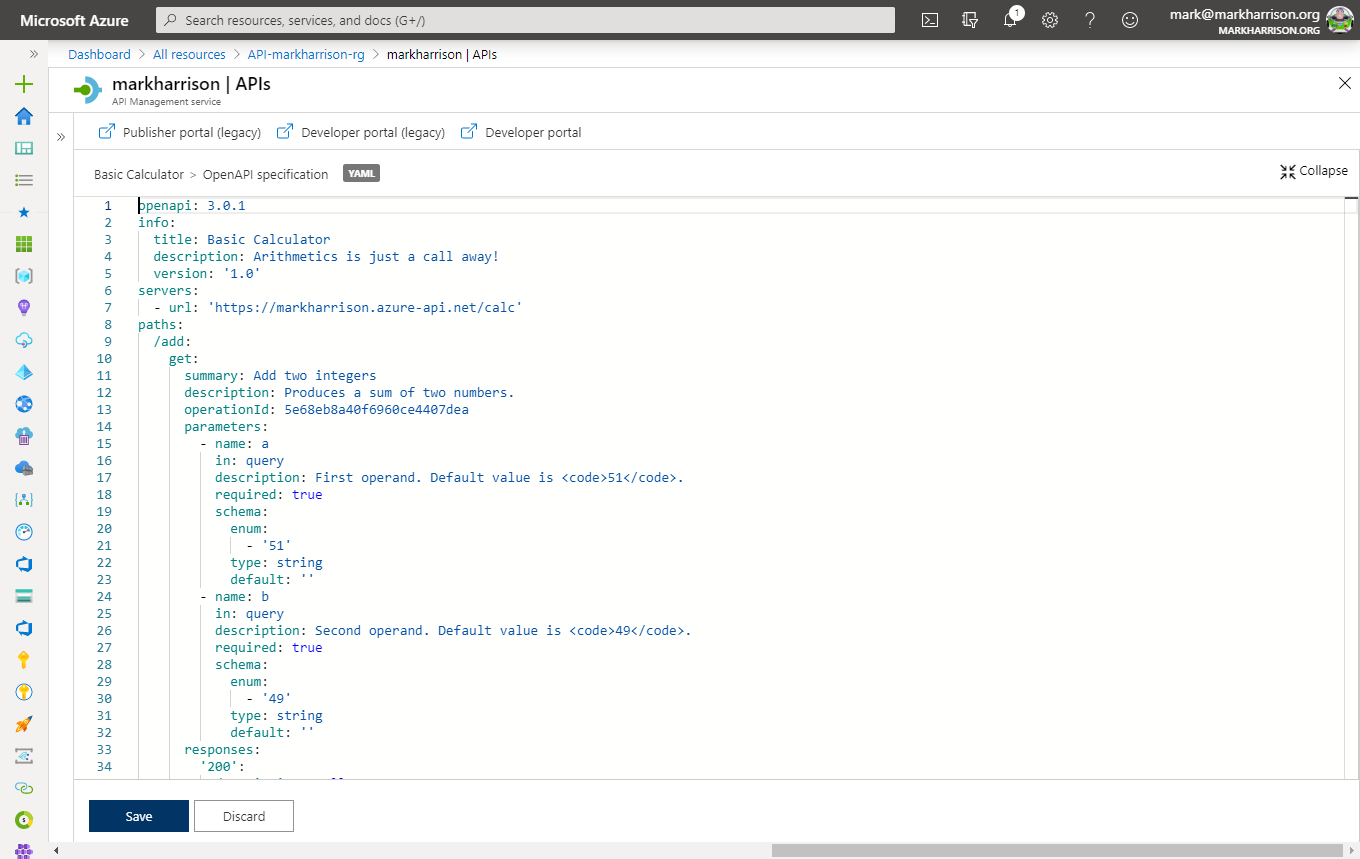
We can inspect / edit the Open API definition by selecting the Edit icon from the Frontend block:
Let’s use another example - the Colors API
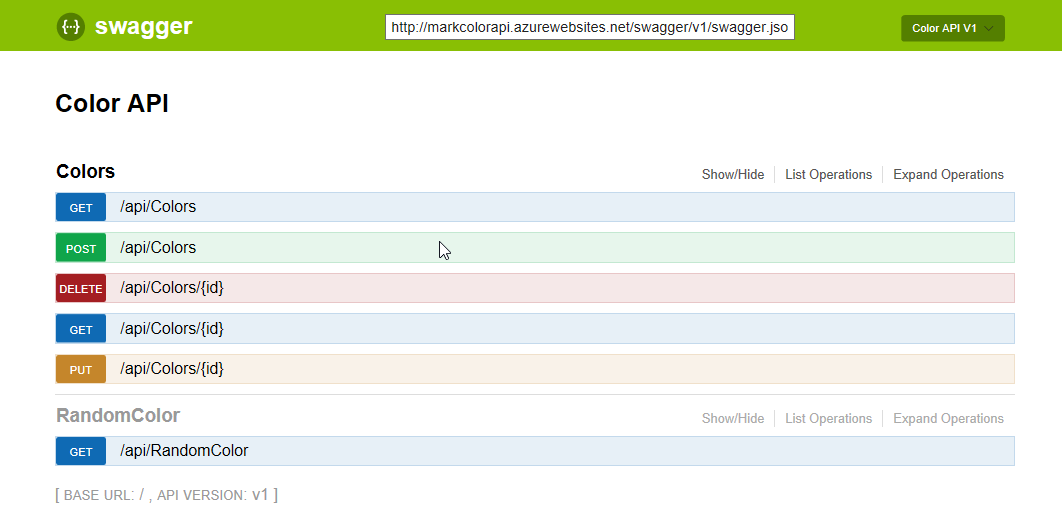
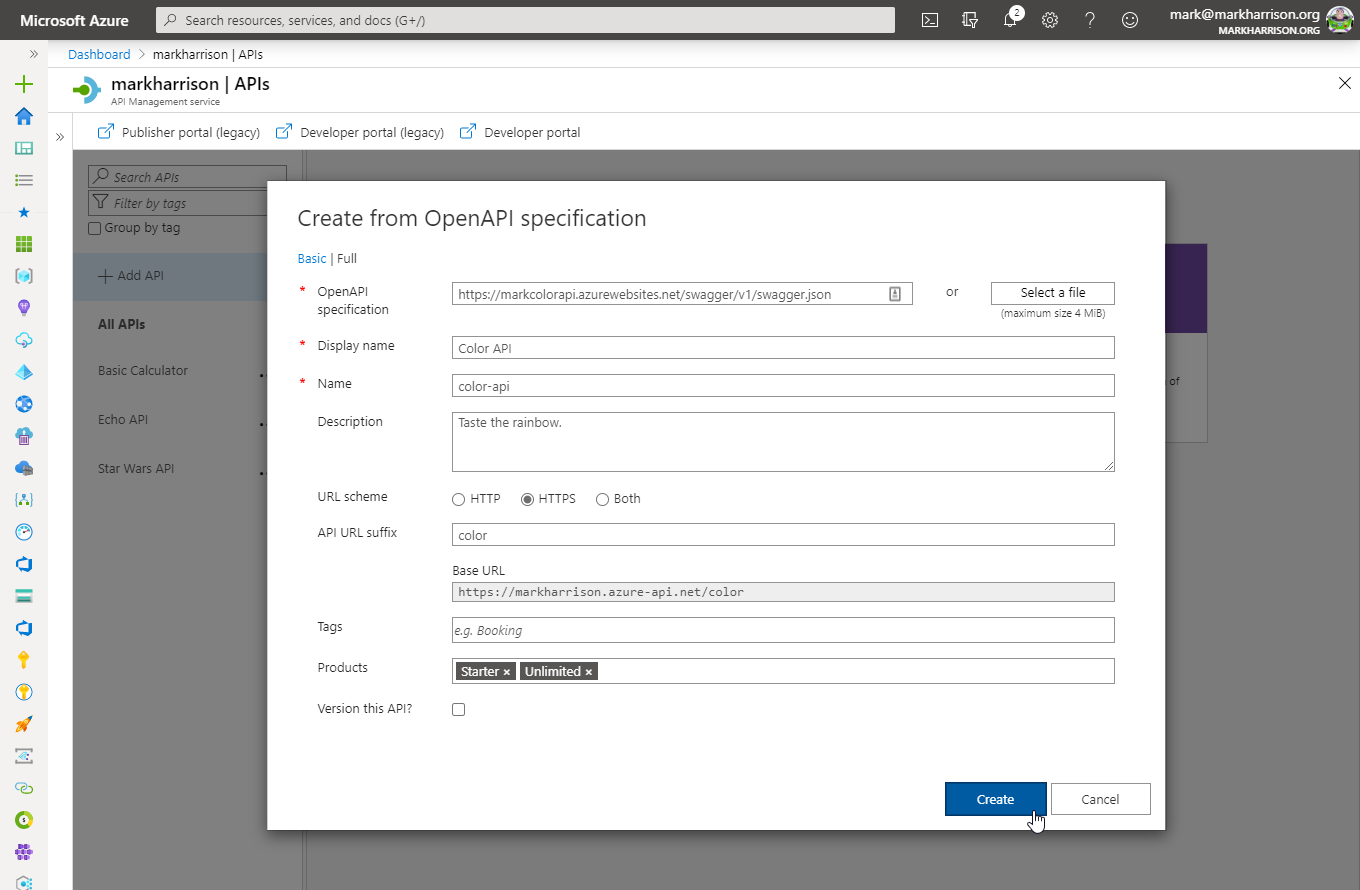
- Create a new API with OpenAPI specification and import swagger from > https://markcolorapi.azurewebsites.net/swagger/v1/swagger.json
- Use “color” in URL for API
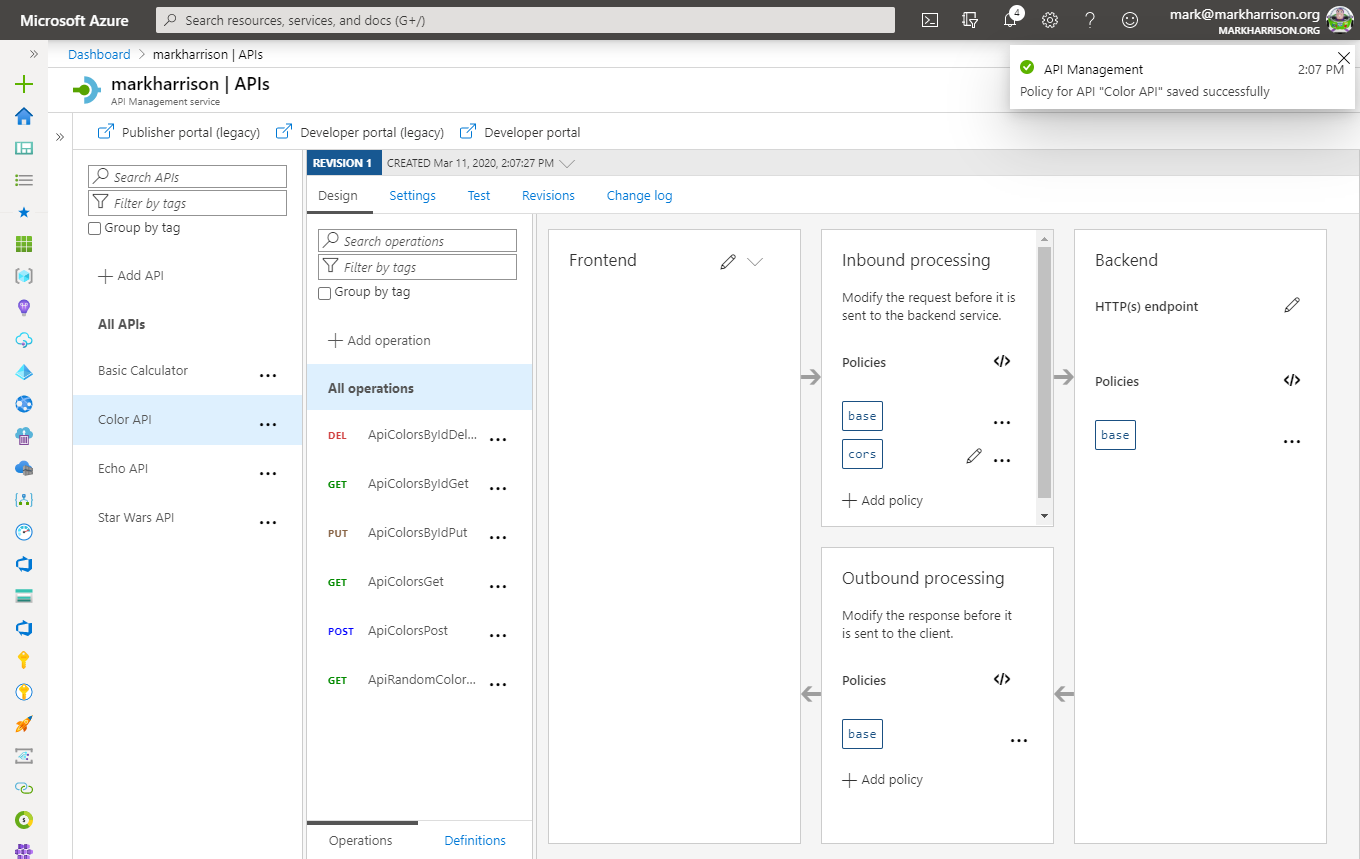
The swagger file did not contain the name of the host so you need to update it manually
- Select [Settings]
- Amend Web Service URL to https://markcolorapi.azurewebsites.net
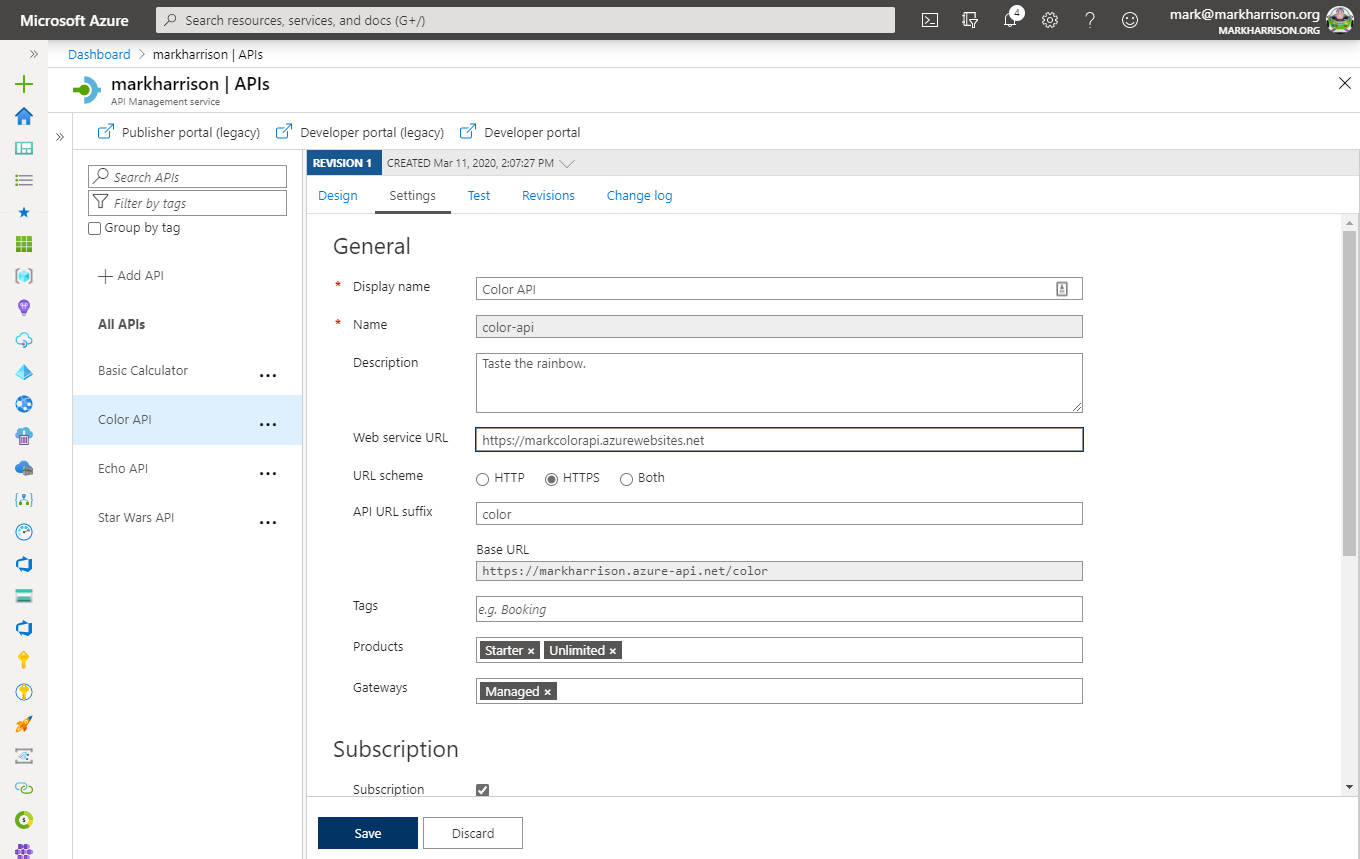
We can test this from the [Test] tab
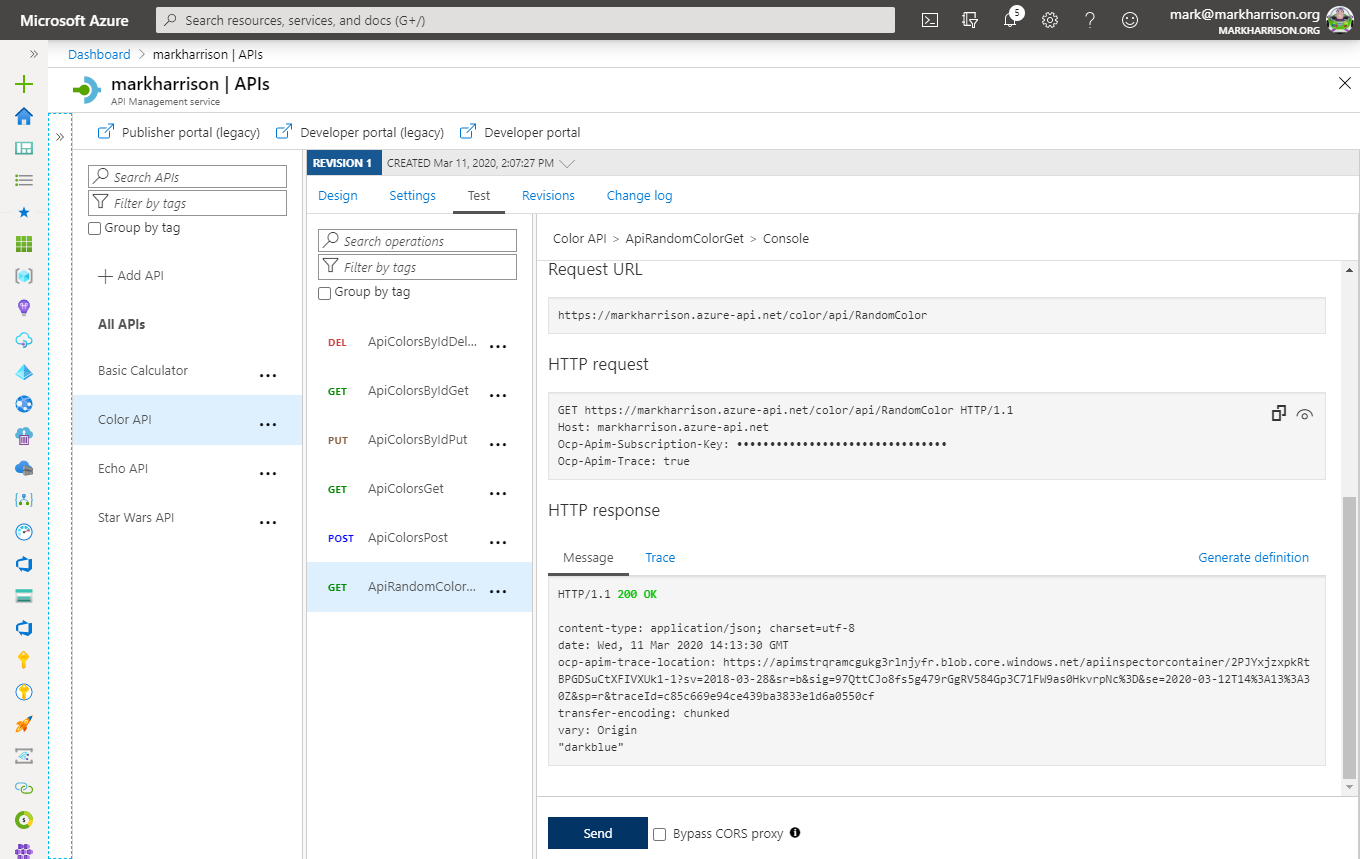
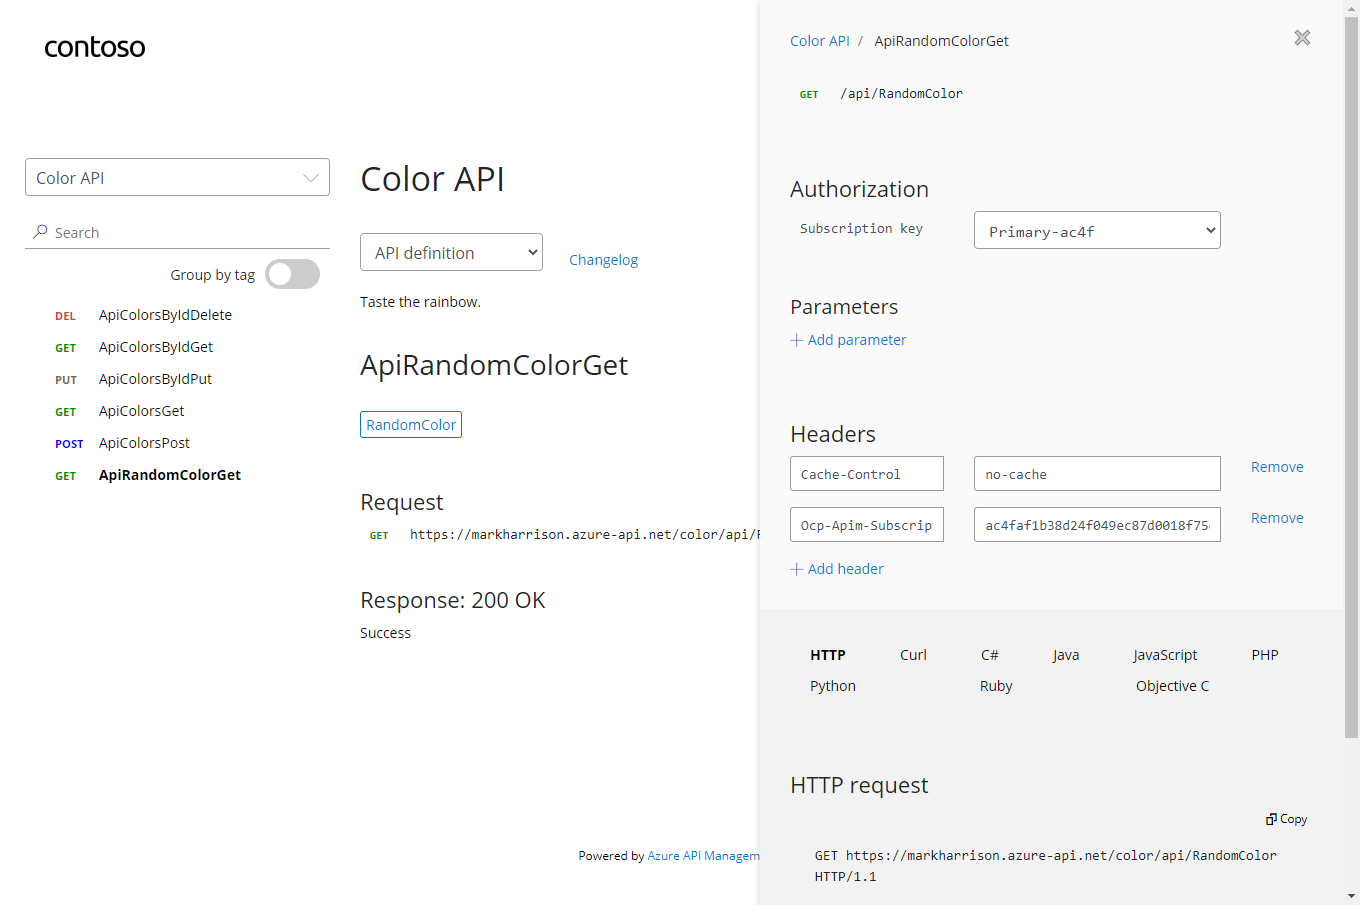
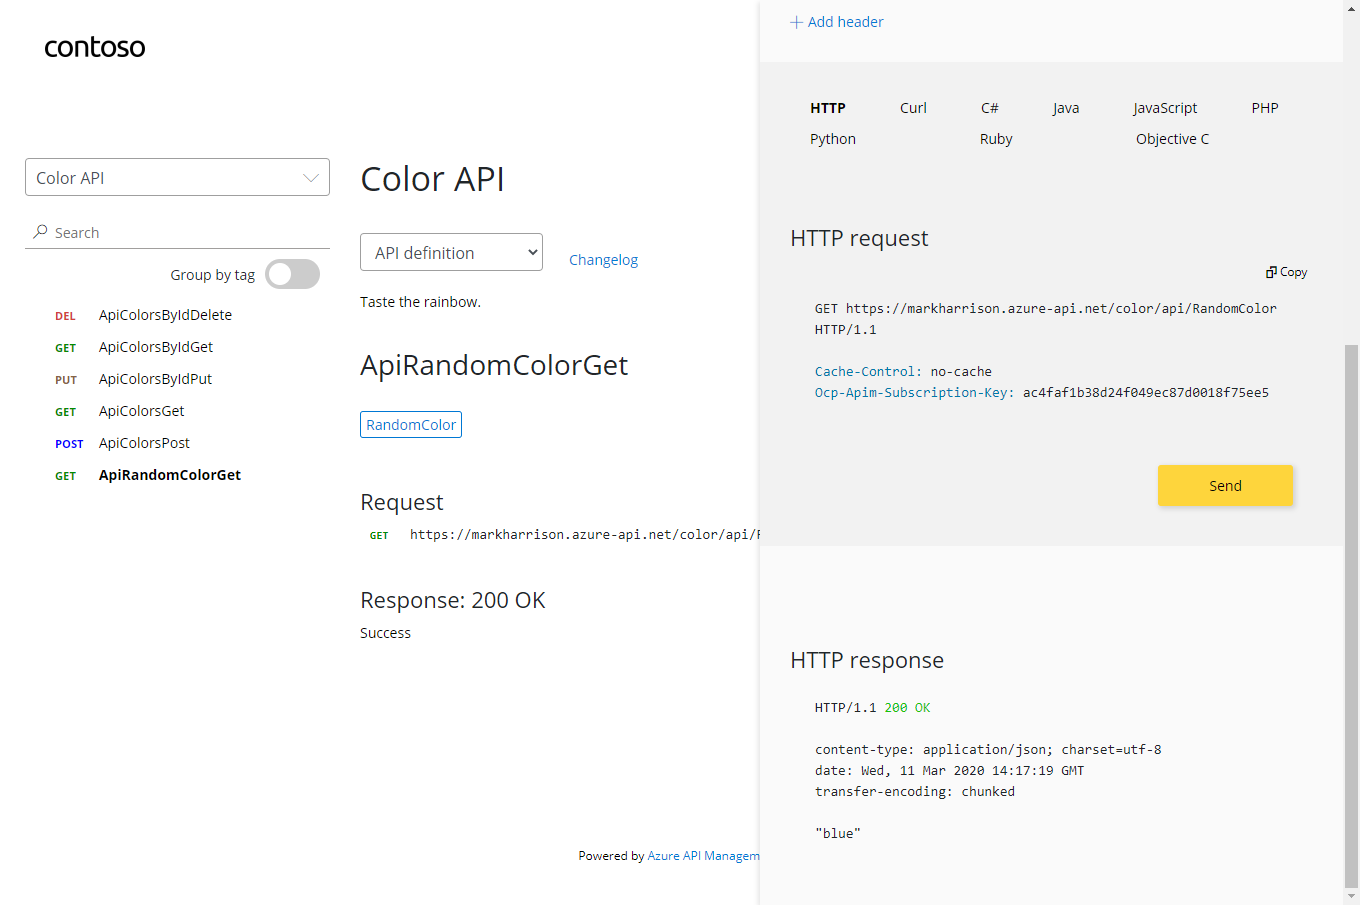
Switch to the Developer portal and look at Color API
- Try the RandomColor operation
- Look at Response / Trace … see the random color returned
Rate limit
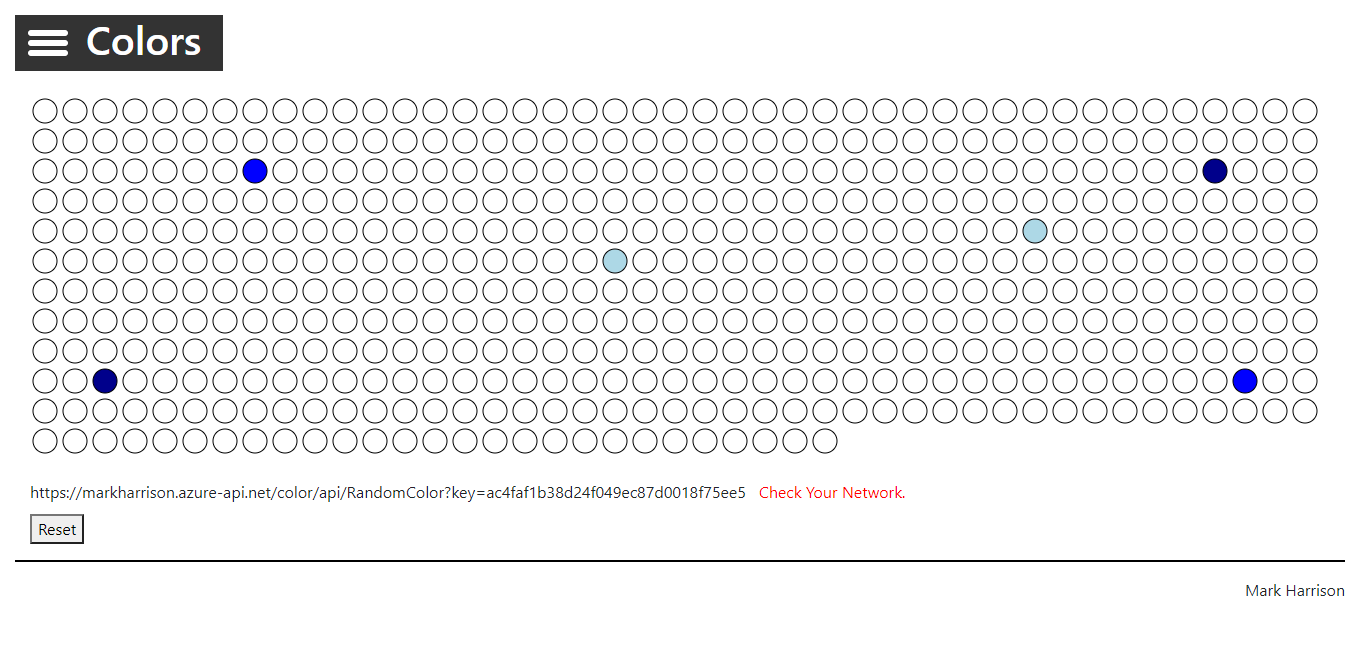
Use Colors website which displays 500 lights. Each light will at random intervals make a call to the RandomColor API - and then display the color returned.

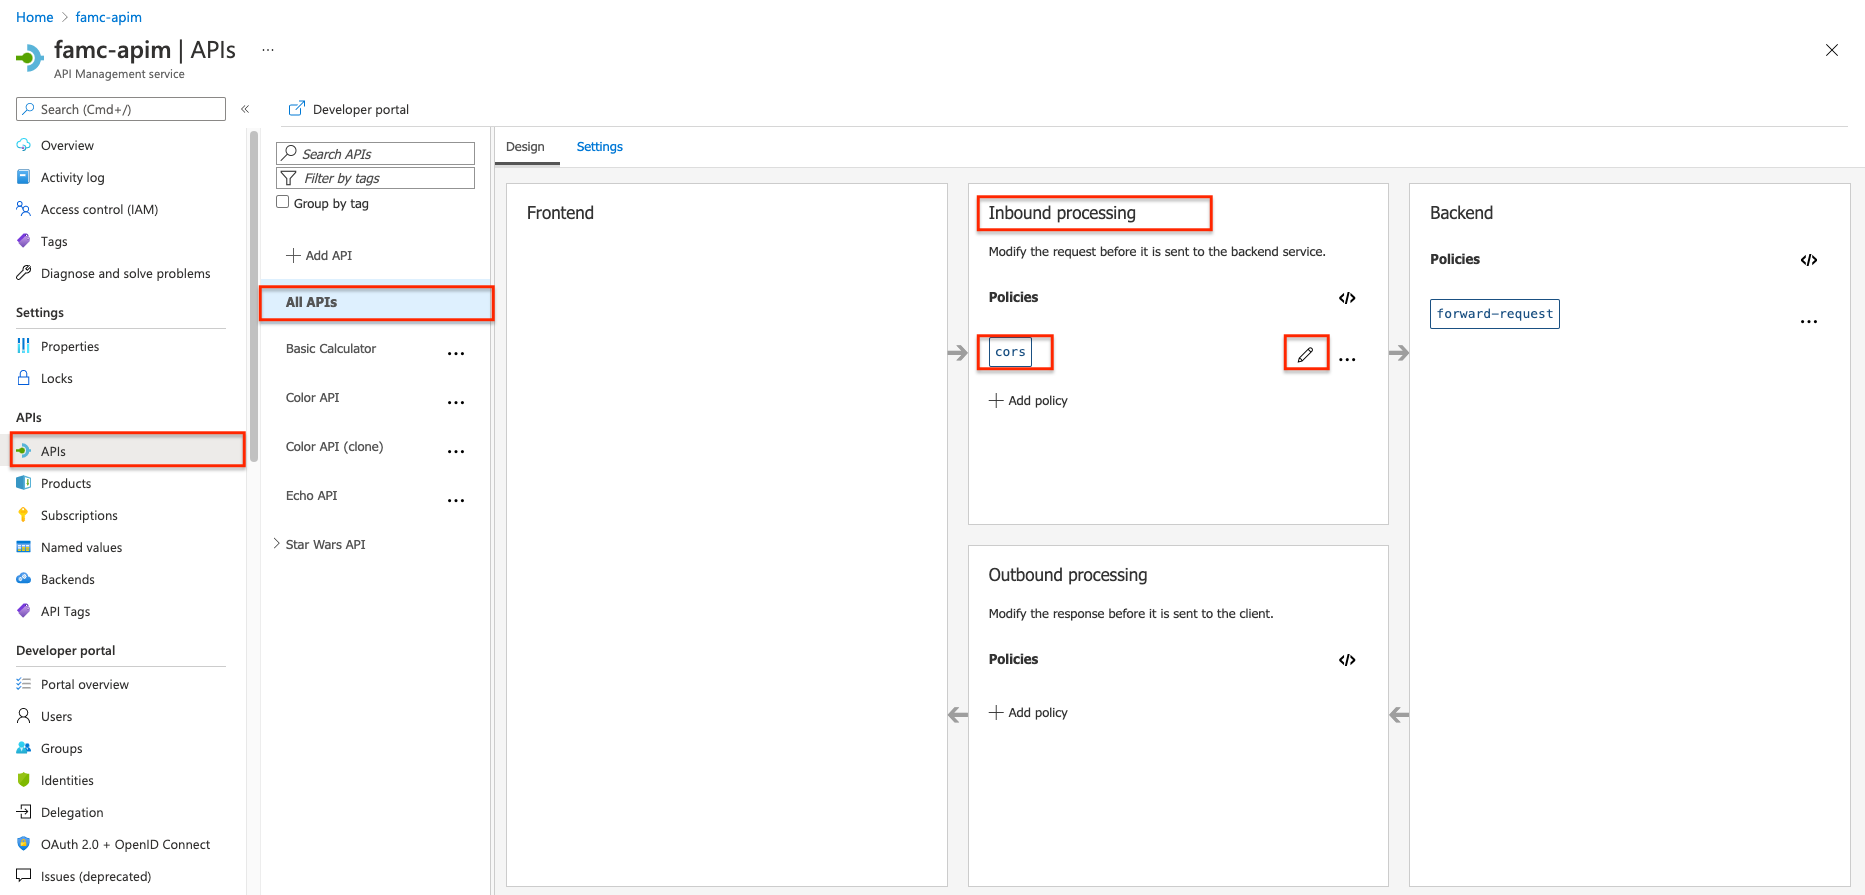
First we will need to enable CORS for the domain name of the frontend. To achieve this we have to do the following:
- On the left Menu, click on
APIs - Then select the
All APIsoption - Then go to the
Inbound Processingarea - There you will find a
corspolicy(this was added in part 2, when we used the “Enable Cors” button) - Click on the
editicon
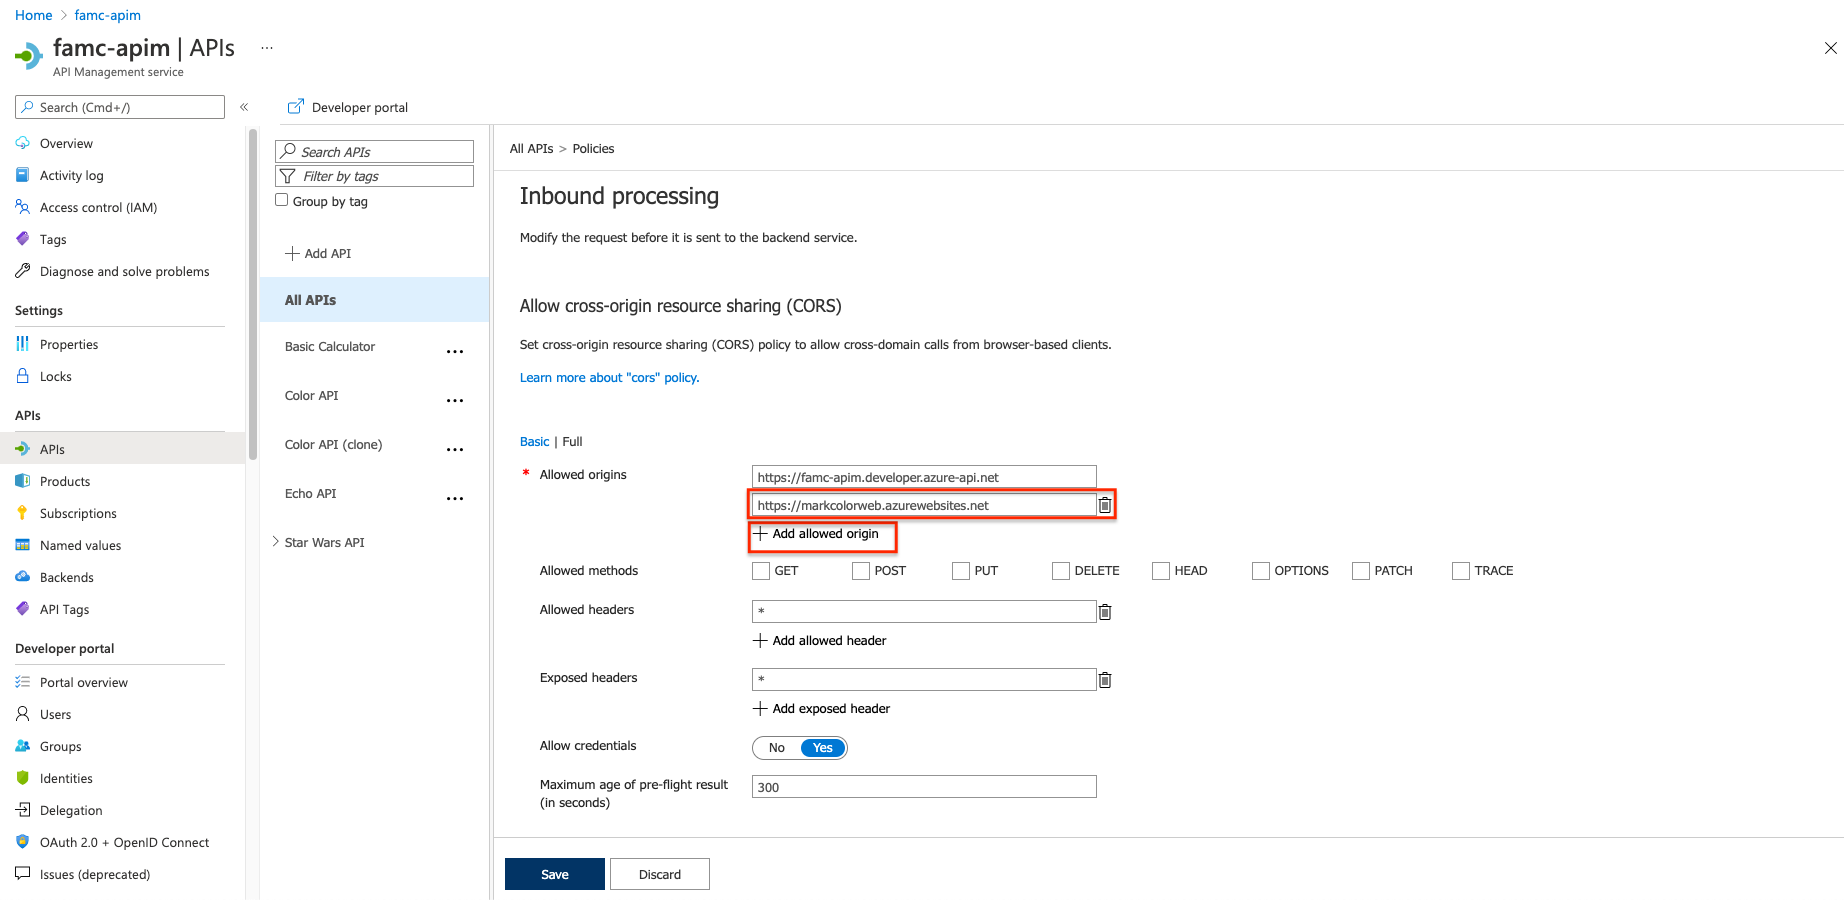
Here we will se this form, where we can add the domain name of our frontend https://markcolorweb.azurewebsites.net or the * for all domains:
Via the menu - there is a configuration page to specify the API endpoint

Open Developer portal, go in the Profile page and get API keys for Starter and Unlimited products
- Open Notepad - make note of URLs

- To see that Unlimited product has no rate limits
- Configure Color Website to use Unlimited URL
- Select [Start]
- Notice there is no Rate Limit - every light is randomly updated
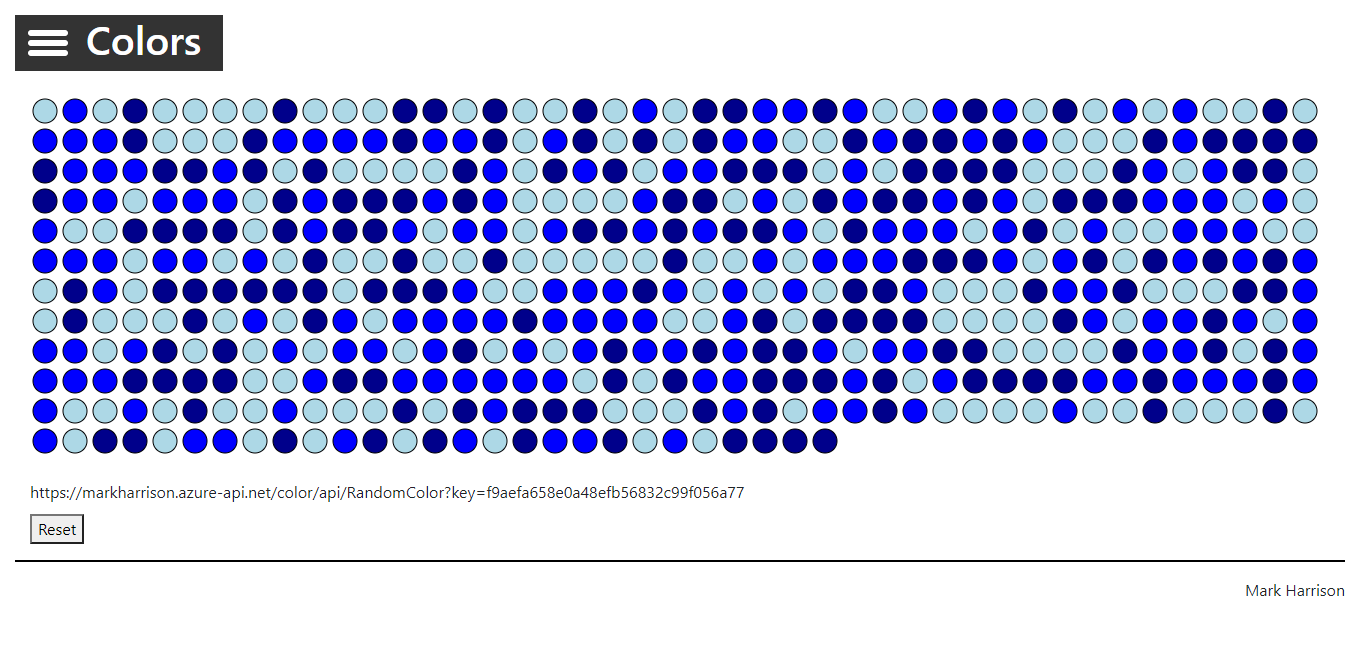
- To see that Starter product is limited to 5 calls per minute
- Configure Color Website to use Starter URL
- Select [Start]
- Notice that only 5 lights get colored
- Try URL with the Starter key, directly in the web browser address bar
- Notice the error status / message returned
- Example: { “statusCode”: 429, “message”: “Rate limit is exceeded. Try again in 54 seconds.” }
